
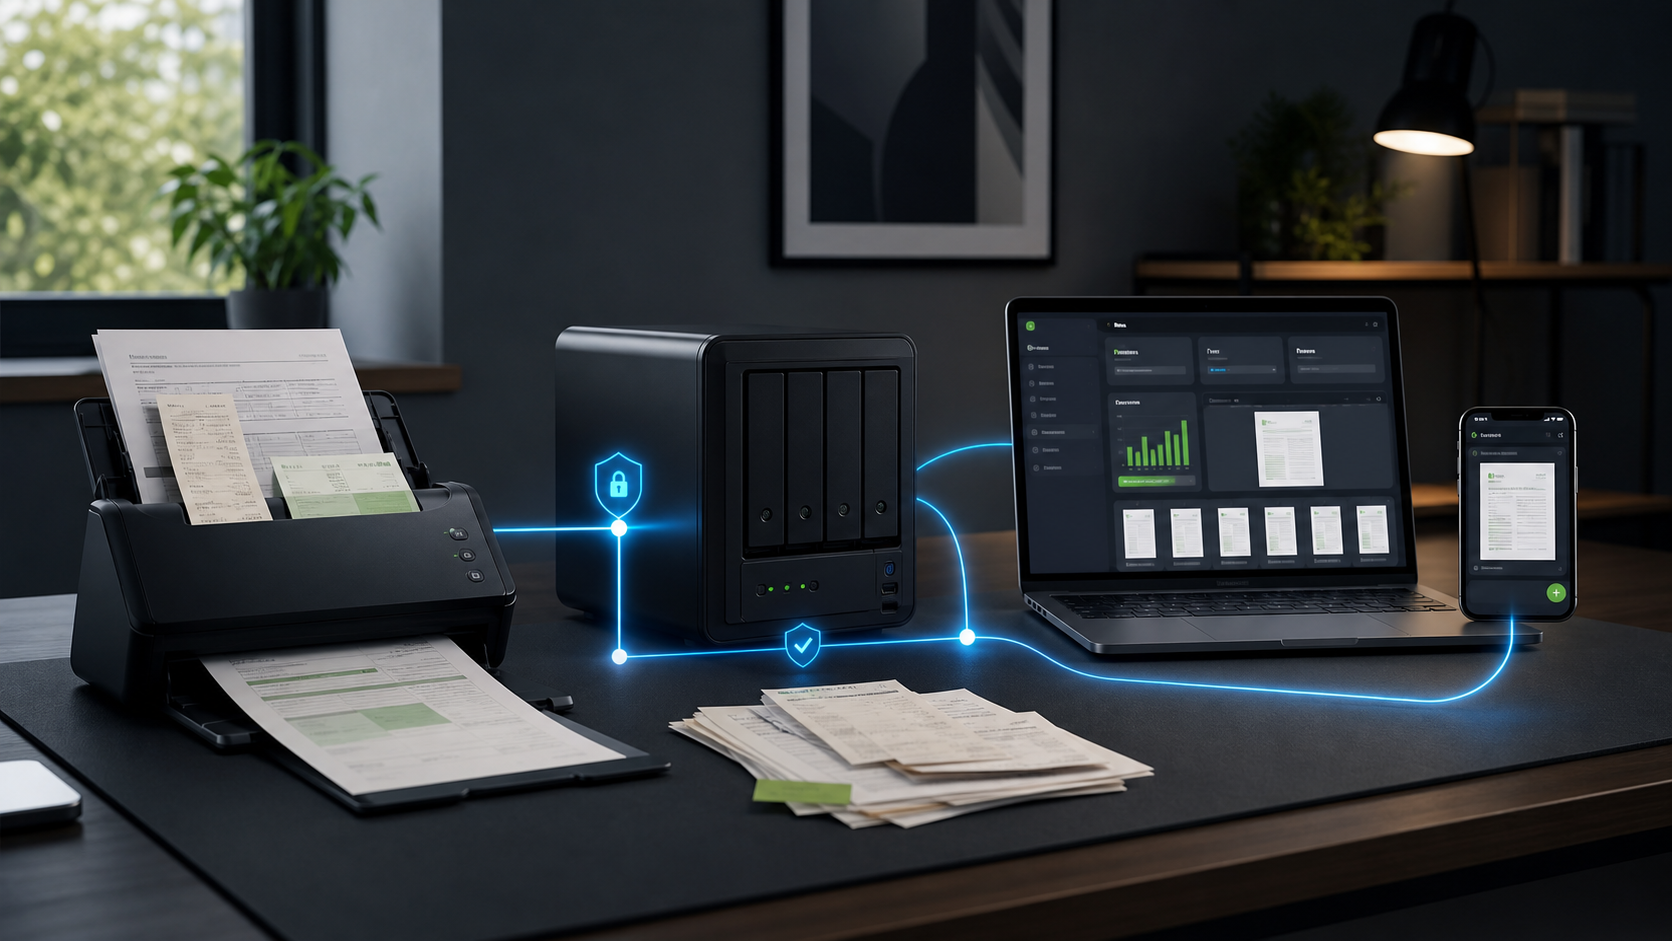
I used to treat important paperwork like a problem for future me. Tax forms went in one folder, receipts in another, insurance paperwork somewhere near the printer, and anything that arrived as a PDF lived wherever the browser decided to save it. The system worked right up until I needed one specific thing quickly.
The better version is simple: run Paperless-ngx on hardware you control, let it OCR and index the documents, and reach it through WG0 from the devices you trust. You get the useful part of a cloud document vault without handing your archive to another account, another SaaS bill, or a public login page.
The rule: Paperless-ngx should be easy for you to reach and boring for everyone else. No router port forwarding. No public document portal. No reverse proxy pointed at the family tax archive. Put it in your own private WG0 cloud and keep the public internet out of the path.
What you are building
Paperless-ngx is an open-source document management system for turning physical and digital documents into a searchable archive. Its own documentation describes the core job clearly: it transforms physical documents into an online archive, performs OCR, stores originals alongside archive versions, and indexes your content so you can find it later.
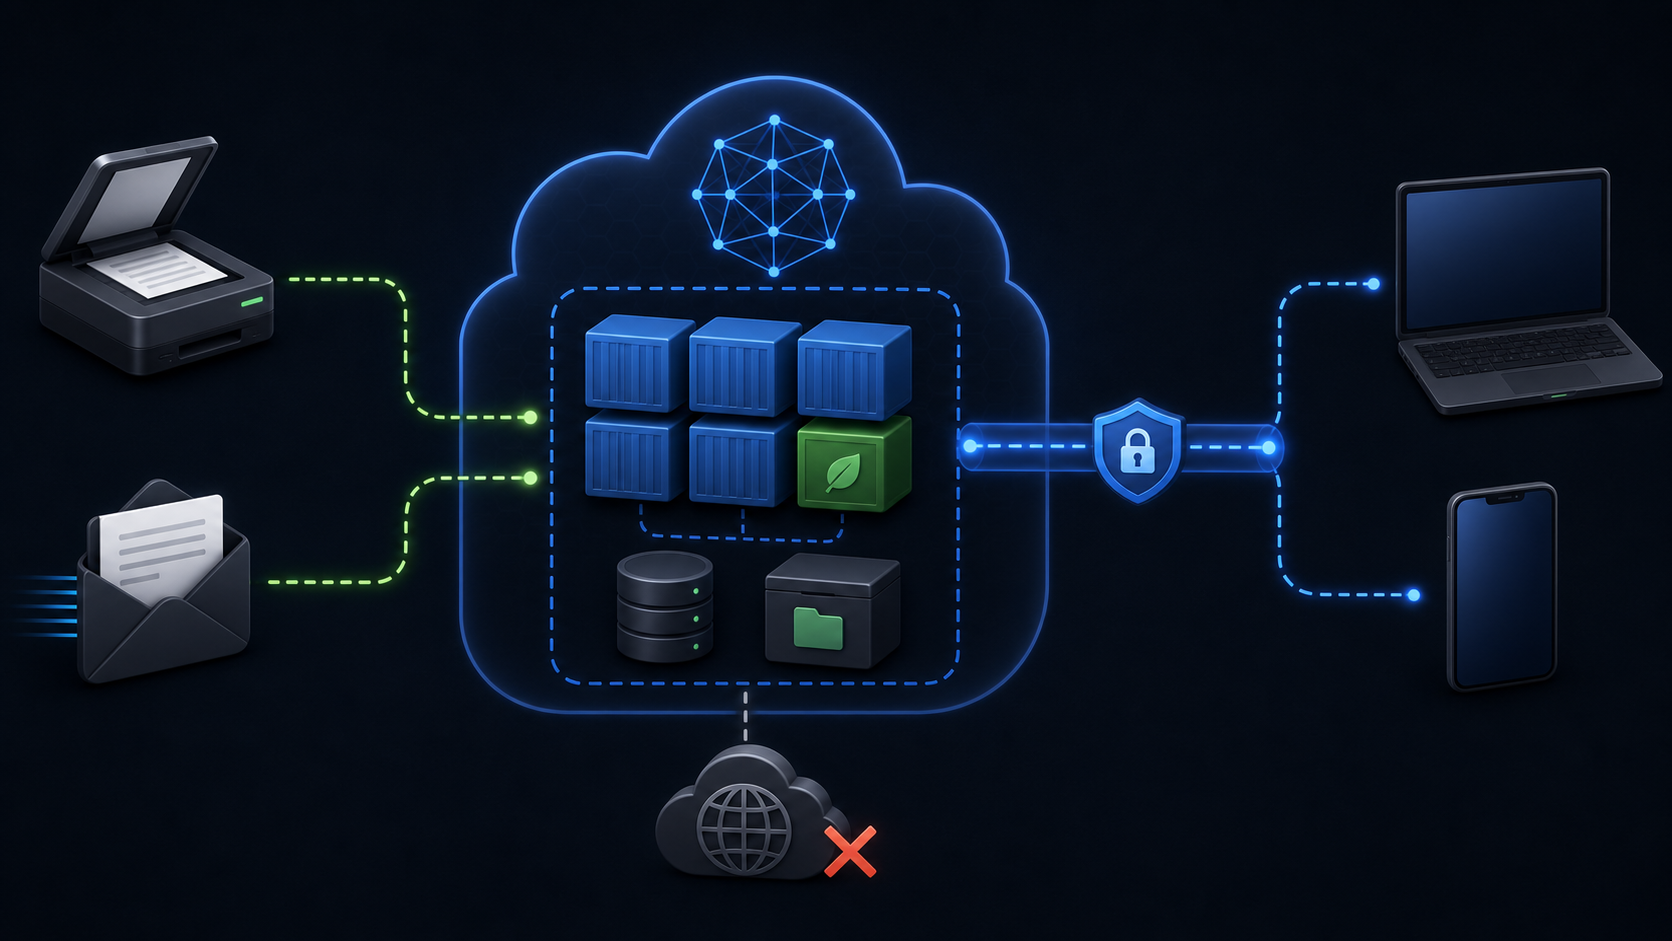
WG0 is the private network layer. You install WG0 on the machine that runs Paperless-ngx and on the laptops, phones, or admin machines that need access. Those approved devices can reach the archive over the private mesh. Random traffic from the internet gets nothing because there is nothing public to connect to.
Minimal
A spare laptop, desktop, or Raspberry Pi with external storage. Upload through the Paperless web UI or a phone scanning app. Good for getting started.
Always on
A NAS, NUC, mini PC, or Mac mini running Docker. Add a watched consume folder, scanner workflow, backups, and WG0 access from every device.
Power user
Paperless-ngx with PostgreSQL, Redis, Gotenberg, Tika, email ingestion, automation hooks, and optional local AI tagging through Ollama or another local model host.
Why Paperless belongs behind WG0
A Paperless-ngx archive is convenient because it concentrates valuable records in one place. That is also why it should not be exposed casually. Tax forms, identity documents, medical explanations of benefits, insurance claims, invoices, signed contracts, bank records, receipts, and warranty paperwork are exactly the files you want indexed, searchable, and protected.
Passwords matter, but passwords are not a reason to put a sensitive internal app on the public internet. Web applications have bugs. Dependencies have vulnerabilities. People reuse credentials. Reverse proxies get misconfigured. WG0 changes the shape of the problem: Paperless can stay on your server, reachable only across the private network your devices join.
In practice, that means your laptop at a hotel, your phone on cellular, and your home server can behave as if they are on the same private network. You open the Paperless URL over WG0, upload a document, search for a receipt, or review tags. Nobody else sees a useful service at that address.
Pick the hardware lane
You do not need a rack server. Start with the hardware you already have, then upgrade when the workflow proves useful.
- Raspberry Pi or small Linux box: low power, cheap, and enough for small batches. Use good storage and expect OCR to take longer on image-heavy documents.
- NAS: natural fit for documents because storage, snapshots, and backup jobs already live there. Make sure Docker or containers are supported well.
- Mini PC or Mac mini: the easiest always-on lane for most households. Plenty of CPU for OCR, enough memory for containers, and simple USB scanner support.
- Existing home server: best if you already run Docker, backups, monitoring, and other self-hosted services.
The one non-negotiable is backup. A searchable archive is only calming if you can restore it. Paperless-ngx supports exporter/importer workflows, and Docker installs also need volume and database backups. At minimum, back up the media volume, data volume, database, and an export copy to another disk or another WG0-connected machine.
Set up the Paperless-ngx stack
The official Paperless-ngx documentation recommends Docker routes for most users and recommends PostgreSQL for new installations. A practical home stack includes Paperless-ngx, Redis, PostgreSQL, Gotenberg, and Tika. Gotenberg helps convert Office-style documents to PDF. Tika helps extract text from document types beyond simple PDFs and images.
Start with a directory on your server:
mkdir -p ~/paperless/{consume,media,data,export}
cd ~/paperless
Then use a Compose file like this as a starting point. Change passwords, host paths, timezone, and the public URL before treating it as production.
services:
  broker:
    image: docker.io/library/redis:7
    restart: unless-stopped
    volumes:
      - redisdata:/data

  db:
    image: docker.io/library/postgres:16
    restart: unless-stopped
    environment:
      POSTGRES_DB: paperless
      POSTGRES_USER: paperless
      POSTGRES_PASSWORD: change-this-password
    volumes:
      - pgdata:/var/lib/postgresql/data

  gotenberg:
    image: docker.io/gotenberg/gotenberg:8
    restart: unless-stopped
    command:
      - "gotenberg"
      - "--chromium-disable-javascript=true"
      - "--chromium-allow-list=file:///tmp/.*"

  tika:
    image: ghcr.io/paperless-ngx/tika:latest
    restart: unless-stopped

  webserver:
    image: ghcr.io/paperless-ngx/paperless-ngx:latest
    restart: unless-stopped
    depends_on:
      - broker
      - db
      - gotenberg
      - tika
    ports:
      - "8000:8000"
    volumes:
      - ./data:/usr/src/paperless/data
      - ./media:/usr/src/paperless/media
      - ./export:/usr/src/paperless/export
      - ./consume:/usr/src/paperless/consume
    environment:
      PAPERLESS_REDIS: redis://broker:6379
      PAPERLESS_DBHOST: db
      PAPERLESS_DBNAME: paperless
      PAPERLESS_DBUSER: paperless
      PAPERLESS_DBPASS: change-this-password
      PAPERLESS_SECRET_KEY: change-this-long-random-secret
      PAPERLESS_TIME_ZONE: America/Detroit
      PAPERLESS_OCR_LANGUAGE: eng
      PAPERLESS_URL: http://paperless.your-wg0-name:8000
      PAPERLESS_TIKA_ENABLED: 1
      PAPERLESS_TIKA_GOTENBERG_ENDPOINT: http://gotenberg:3000
      PAPERLESS_TIKA_ENDPOINT: http://tika:9998

volumes:
  redisdata:
  pgdata:
Bring it up:
docker compose pull
docker compose up -d
docker compose logs -f webserver
Create the first Paperless user when the web UI prompts you. Then install WG0 on that same server, enroll it into your network, and connect from your laptop or phone through WG0. If you prefer a stricter host firewall, allow Paperless only from the WG0 interface or WG0 subnet and deny it from untrusted interfaces.
Getting started in your own private WG0 cloud
- Create a WG0 account and make your first network from the dashboard.
- Install WG0 on the Paperless server. A NAS, mini PC, or existing Docker host is the right place to start.
- Install WG0 on your laptop and phone. These become the only devices that need direct access to Paperless.
- Start Paperless-ngx with Docker Compose. Keep router port forwarding off. Use WG0 for remote access.
- Open Paperless over the WG0 path. Use the server's WG0 address or a private name you control, then bookmark it.
- Scan a test document. Put a PDF into the consume folder, upload through the web UI, or send one from your scanner.
- Set the backup job before importing everything. A document vault without restore testing is just a pile with better search.
That is the whole pitch: your documents stay on your server, Paperless gives you search and organization, and WG0 gives you private reachability without turning the archive into a public website.
Getting paper into Paperless
Paperless-ngx gives you several ingestion paths. The simplest is the web UI: drag in a PDF or image and wait for OCR. The more automated path is the consume directory. Paperless watches that folder, processes new files, stores them in its own media structure, and removes them from the temporary consume folder after successful consumption.
For a scanner, the common pattern is to scan into a network folder. Many scanners can write to Samba, FTP, SFTP, or a vendor utility that drops files into a folder. Point that target at a staging folder, then move finished files into the Paperless consume folder. That avoids Paperless grabbing a file while the scanner is still writing pages.
Email ingestion is also worth setting up for receipts, statements, travel confirmations, invoices, and Explanation of Benefits mail. Paperless can connect to mail accounts and apply rules so only matching messages or attachments are consumed. Use a dedicated mailbox or label, and test with harmless documents before handing it anything important.
Tags, correspondents, and OCR
Paperless is valuable because it turns piles into filters. Tags can represent broad categories like taxes, medical, home, auto, warranty, legal, and reimbursable. Correspondents identify the organization or person behind a document. Document types distinguish invoices, statements, receipts, notices, forms, and letters.
Do not try to perfect the taxonomy on day one. Import a small batch, search for common terms, add a few tags, and let matching rules grow from real documents. The official usage docs describe the intake process as OCR, archive PDF creation, automatic matching, indexing, and storage. Give the system enough examples and it becomes much easier to tune.
Optional local AI
Once the archive is searchable, local AI can help with titles, summaries, suggested tags, and oddball documents that do not match simple rules. Keep this optional. Paperless-ngx already does a lot without an LLM.
If you do add AI, keep the model endpoint private too. Run Ollama, LM Studio, or another local model server on the same host or on another WG0-connected machine. Do not publish the model server to the internet. Let Paperless-related tools talk to it across localhost or WG0.
Use AI output as assistance, not authority. A model may invent categories, overfit names, or confidently summarize a document incorrectly. That is tolerable for draft tags. It is not acceptable for legal, tax, or medical decisions.
Backups before ambition
Before scanning a decade of paperwork, make recovery boring. For Docker, back up the Paperless media, data, export, Redis, and database volumes. If you use PostgreSQL, back up PostgreSQL too. The Paperless administration docs also cover the document exporter and importer, which are useful for migration and recovery workflows.
A realistic home backup plan might look like this:
- Nightly database dump and Paperless exporter output to a local backup directory.
- Daily encrypted copy to another disk, NAS, or a trusted off-site machine reachable over WG0.
- Monthly restore test into an empty Paperless instance.
- Quarterly offline copy to a USB drive stored away from the server.
Any backup is better than none. A tested backup is better than a backup you hope works.
Where to take it next
- n8n or webhooks: notify a family member when a tagged document arrives, archive certain receipts, or trigger a reimbursement workflow.
- Syncthing or rclone: pull documents from a phone folder, cloud bucket, or another local machine into the consume workflow.
- Paperless exporter jobs: generate a structured backup you can restore or migrate later.
- WG0 shared access: give a spouse, accountant, or trusted helper access to the private network without exposing the service publicly.
- Private AI worker: run OCR enhancement or tagging helpers on a stronger machine while keeping the archive itself on your NAS.
Sources and further reading
- Paperless-ngx documentation for the project overview, OCR, search, and file support.
- Paperless-ngx setup guide for Docker, PostgreSQL, bind mounts, and installation notes.
- Paperless-ngx usage guide for the consume directory, web upload, mobile upload, and email consumption.
- Paperless-ngx administration guide for backup, restore, exporter, importer, and maintenance commands.
Build the private document vault first.
Start with WG0, one small server, and a Paperless-ngx stack. Scan the first folder, prove search works, then expand the workflow.
WireGuard is a registered trademark of Jason A. Donenfeld. WG0 builds on WireGuard and is not affiliated with the WireGuard project.